
Introduction
Bathroom reconstruction can completely transform one of the most important spaces in your home. Whether you are dealing with outdated fixtures, worn out tiles, or an inefficient layout, a well planned reconstruction project can enhance both functionality and style. This step by step guide will walk you through the essential stages of bathroom reconstruction so you can achieve a flawless upgrade without unnecessary stress.
Understanding the Difference Between Remodeling and Reconstruction
Before starting, it is important to understand that reconstruction often involves more extensive changes than simple remodeling. While remodeling may focus on surface level improvements such as replacing fixtures or repainting walls, reconstruction can require reconfiguring the layout, addressing plumbing and electrical systems, and upgrading structural elements. This approach ensures that the bathroom not only looks new but functions optimally.
Step 1: Assess Your Current Bathroom
Start by evaluating your bathroom’s current condition. Look for:
- Damaged flooring or tiles
- Leaks or plumbing issues
- Poor ventilation
- Insufficient storage
- Outdated or inefficient fixtures
Make a list of elements that need replacement or improvement. This will serve as the foundation for your project plan.
Step 2: Define Your Goals
Consider what you want to achieve with your new bathroom. Goals may include:
- Improving layout and space usage
- Creating a more luxurious appearance
- Adding energy efficient features
- Enhancing safety with slip resistant flooring and accessible design
Clear goals will help guide design choices and budget allocation.
See also: Latest Innovations in Solar Panel Technology
Step 3: Set a Realistic Budget
Determine how much you are willing to invest. Your budget should cover:
- Materials and finishes
- Labor costs
- Permits and inspections
- Unexpected expenses
Setting aside a contingency fund is wise, as reconstruction projects sometimes uncover hidden issues.
Step 4: Create a Functional Design
Work with a design concept that reflects your style while maximizing functionality. Consider:
- Optimal placement of fixtures such as sinks, toilets, and showers
- Adequate lighting for grooming and relaxation
- Storage solutions that keep essentials organized
- Ventilation to prevent moisture related problems
A well thought out design will ensure your bathroom remains practical and visually appealing for years.
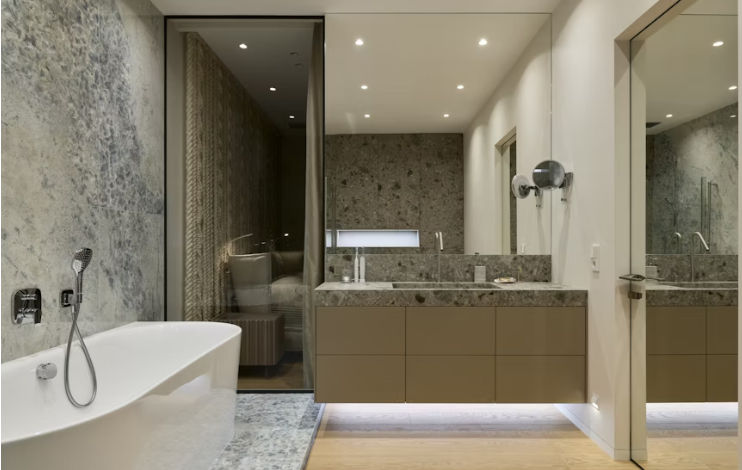
Step 5: Choose Quality Materials
Selecting durable materials is crucial for a bathroom environment. Popular choices include:
- Porcelain or ceramic tiles for floors and walls
- Quartz or granite for countertops
- Moisture resistant paint for walls and ceilings
- High quality fixtures with long lasting finishes
Investing in quality now will reduce maintenance costs later.
Step 6: Address Plumbing and Electrical Needs
Bathroom reconstruction often involves updating or relocating plumbing and electrical systems. Ensure that:
- Pipes are in good condition and meet current standards
- Electrical wiring can handle modern appliances and lighting
- Outlets are placed conveniently and meet safety requirements
This step ensures the bathroom’s functionality and safety.
Step 7: Obtain Necessary Permits
Many reconstruction projects require permits, especially if they involve plumbing, electrical, or structural changes. Contact local authorities to confirm requirements before beginning work. Having proper permits will prevent legal issues and ensure compliance with building codes.
Step 8: Begin Demolition
Demolition involves removing old fixtures, flooring, and walls. Take safety precautions such as wearing protective gear and shutting off water and electricity. This phase clears the way for the new design.
Step 9: Structural and Rough Work
This stage includes repairing or modifying structural elements, installing new plumbing lines, and running electrical wiring. It is essential to complete these tasks correctly before moving on to finishes.
Step 10: Install Fixtures and Finishes
Once the foundational work is complete, install new fixtures such as bathtubs, sinks, and toilets. Follow with finishes like tile installation, painting, and lighting. Pay attention to detail for a professional look.
Step 11: Add Storage and Accessories
Incorporate cabinets, shelving, and organizers to maximize storage space. Add mirrors, towel racks, and other accessories that complement your design while serving practical purposes.
Step 12: Final Inspection and Cleaning
Before using your new bathroom, conduct a thorough inspection to ensure all systems work properly and finishes are flawless. Clean the space to remove dust and debris from construction.
Tips for a Smooth Bathroom Reconstruction
- Plan each step in advance to avoid delays
- Choose materials that combine style with durability
- Work with experienced professionals for specialized tasks
- Maintain open communication throughout the project
- Keep safety a priority during all phases
Conclusion
Bathroom reconstruction is a detailed process that requires careful planning, quality materials, and skilled execution. By following a clear step by step approach, you can transform your bathroom into a space that is both beautiful and highly functional. With the right preparation, your new bathroom will provide comfort and value for many years to come.